

Tuesday, November 9, 2010
so, it turns out...
...that I want to write about more than just food. So you can find me over at a new blog called Becoming Gezellig for now. Sure, there'll still be food, and it'll mostly be seasonal, because that's how I roll. (For example: head on over there to see what to do with a glut of late, not-so-great tomatoes.) But I also wanted a space with fewer rules, more photos, more fabric. Hope you'll come along.

Thursday, October 28, 2010
wherever you are, here you go

I'm just going to take a guess here: Either you have distinctly crisp fall weather and a bin full of the last straggling zucchini, or you have bright, warm Indian summer and markets full of winter squash. Call it Cucurbit-Induced Cognitive Dissonance: a condition endemic this time of year.


Well, I have a remedy.

First, turn on your oven. Gather up some squash of whatever variety (I suppose you could even mix summer and winter), cut them into chunks, and roast them with butter. That bit is important, there's just something about the way the flavor of squash marries with butter, trust me. When those squash chunks are nice and soft toss them into a casserole dish along with some pasta and a simple cheese sauce.

The dish is an adaptation of a recipe for macaroni and cheese with butternut squash that has been round and round the Internet several times but I'm pretty sure originated here. My version simply swaps out the winter squash for summer (but of course, you can swap the winter squash back in). And, because I couldn't find my printed recipe when it was time to cook (I recently organized my recipes, and now I can't find any of them), I just worked from memory, and I may have ended up making it a little less...unctuous...than the original.
Which is a good thing, really. Because you're going to have to make this more than once, with all the squash out there of one sort or another.

Cheesy Noodles with Roasted Squash
Adapted from My Madeleine
2.5 lb summer squash (or about 3 lb winter squash, untrimmed)
4 Tbsp butter
salt & pepper
1 lb shaped pasta
2 Tbsp butter
2 Tbsp flour
2 C milk
12 oz cheese, grated (a nice sharp cheddar is good but feel free to mix it up and use what you have on hand)
1 Tbsp dijon mustard
Panko or other bread crumbs
Preheat oven to 400 F. Wash and trim the squash (deseed and peel if it's winter squash), and cut it into roughly 1-inch chunks. In each of 2 large baking pans, put 2 Tbsp butter, and put the pans in the oven to melt the butter while the oven is preheating.
When the butter is melted, take the pans out of the oven, put half of the squash in each, add a little salt and pepper, and stir to coat with the melted butter.
Roast for 40 minutes, stirring at the 15- and 30-minute marks.
Meanwhile, cook the pasta in boiling water until al dente.
And make the cheese sauce: Melt the butter over medium heat, add the flower, and stir with a whisk to make a light roux. Pour in the milk and whisk until smooth and slightly thickened. Add the cheese and stir until melted, then add the mustard and stir until combined.
Combine the pasta, cheese sauce, and roasted squash (the pot you cooked the pasta in is generally good for this) and fold together until everything is evenly distributed. Turn into one of the baking dishes. Sprinkle the bread crumbs on top.
Bake at 400 F for 20 to 30 minutes, until bubbly. Run under the broiler for a minute or two at the end to toast the bread crumbs.
Makes one big pan (so, you know, like 2 servings).

Saturday, October 9, 2010
this weekend

Give me your tired....

your poor...

your huddled masses of green tomatoes....

yearning to turn red.
Also:
-Roasting the red ones
-Blanching the kale
-Wishing I'd planted some seeds back in August
-The rains are here
-Saturday afternoon beer?
Wednesday, August 4, 2010
summer miracle

In college, my vertebrate physiology professor had a New Yorker cartoon posted on her office door showing a couple of people slumped lazily in armchairs. The caption read: "Tropic of Torpor." (A kind of in-joke about her research--my professor studies hibernation in small mammals. As for me, my only excuse for still remembering that cartoon and finding it hilarious is that I am a huge nerd.)
So. For me: summer = Tropic of Blogger. Or Torpor of Blogger, or something. I don't know why I've been struggling so hard to find the motivation to cook and struggling even more to find the motivation to write about it. But there you go.
As if to prove my point, there's this recipe--when the weather turned hot here in Seattle (finally!), my response was to create a dish based on two of my winter staple recipes. The soba noodles at the base are from this dish of boiled kale, and the stew is based on this recipe from Just Hungry that I can't believe I haven't written about here yet (hmm, I blame torpor), because we really do make it all the time.
A recipe that improbably got me into the kitchen for one brief instant: hence the title of this post, a summer miracle. Even more miraculous? The dish caused Monkey to utter the sentence, "Mama, can I have some more turnip?" I still can't believe it myself.
Summer Vegetable Stew with Tofu and Soba Noodles
Even more food for your summer torpor: this stuff is great eaten cold for lunch the next day.
2 large-ish turnips
A dozen big radishes
1/2 of a small onion
1 Tbsp sesame oil
1 package atsu-age (deep-fried tofu cutlet)
2 Tbs. sake (mirin is okay too)
3 Tbs. soy sauce
2 Tbs. dark (grade B) maple syrup
1/4 lb. sugar snap peas
200 g soba noodles
3 tsp kecap manis (or you could use a combination of soy sauce and molasses or maple syrup)
1 1/2 Tbsp rice vinegar
A pinch of ground ginger
Wash and peel the turnips, and cut them into chunks. Wash and trim the radishes, and cut them in half. Slice the onion thinly.
Heat the sesame oil over medium heat in a large skillet. Add the turnips, radishes, and onion, and stir to coat with the oil.
If you want, you can unwrap the tofu cutlet, place it in a large bowl, heat some water to boiling, and then pour the water over the cutlet. Drain and rinse--this gets some of the oil off of the tofu. But you know what? When I made this it was too hot, and I was too lazy! So I skipped this step, and everything was fine.
Cut up the tofu into chunks and add it to the pan, stirring again to mix everything together. Add the sake, soy sauce, and maple syrup and stir. Reduce the heat to low, cover, and simmer about 20 minutes or until the vegetables are tender.
Meanwhile wash and trim the sugar snap peas. Add them to the stew after about 20 minutes and cook about 10 minutes more. You want them to be tender, but not too mushy.
Also while the stew is cooking, heat some water in a saucepan and cook the soba noodles. Drain and toss them with the kecap manis, rice vinegar, and ginger.
To serve, put a mound of soba noodles on a plate and the stew on top.
Makes 4-6 servings.
Tuesday, June 29, 2010
handy

Here's a recipe to put on your calendar for a few weeks from now, when local tomatoes are really, truly in season.
Or, then again, it might come in handy now--say, if you have a child whose response to every item sold at the grocery store is "I want that." And if that child also, theoretically of course, has a parent (I'm not saying which one) inclined to indulge her every whim. And if grape tomatoes bought on such a whim turn out, predictably, to be rather tough and flavorless, prompting the child to sensibly decline actually eating them. And if you're therefore wondering what to do with a few handfuls of grape tomatoes starting to shrivel up in your fridge.
Then--THEN--this recipe will be right up your alley.

Whether you make it now or later, it's summer cooking at its finest--a short list of ingredients, steps you can do ahead of time, a quick final assembly, and a result that goes nicely with a cold, fruity wine.

Pasta with Roasted Tomatoes, Fennel, and Italian Sausage
1 bunch baby fennel, or a medium-sized fennel bulb
1 C grape or cherry tomatoes
olive oil
salt and pepper
6 oz dried pasta--penne or rotelle or a similar short, chunky shape
About 3.5 ounces Italian sausage or veggie Italian sausage
olive oil
balsamic vinegar
Preheat the oven to 400 F. Wash the fennel and chop it into 1/2-inch pieces. Wash the tomatoes. Put in a square baking dish and toss with a little olive oil, salt, and pepper. Put in the oven and roast for about 20 minutes, stirring once or twice, until the tomatoes start to wrinkle and the fennel is tender. You can do this ahead of time--in the morning if a hot afternoon is in the offing, or even a day or two ahead.
When you're ready for dinner, put a large pot of water on to boil for the pasta. When the water boils add the pasta and cook according to package directions.
Meanwhile, heat a little olive oil in a largeish skillet. Slice up the sausage and saute it for a few minutes, until it's nicely browned--turning once halfway through. Deglaze the pan with a little balsamic vinegar. Then add the roasted fennel and tomatoes and heat through.
When the pasta is done, drain it and add it to the skillet, tossing everything together. Pour the wine.
Serves 2 or 3
Saturday, May 29, 2010
more bok choy ideas

Here's another idea I came across when I was looking for something different to do with baby bok choy. The original recipe, from Jane Spice, has you pour a coconut milk-red curry sauce over steamed bok choy. I didn't have any red curry paste, so I decided to use curry powder instead. To the bok choy I added a bunch of teeny-tiny carrots (they always look so cute sitting there at the farmers market but I pass them by because I never know what to do with them), to end up with spring vegetables in a kind of gentle Massaman curry sauce. (Now if only we could get some gentle spring weather to go with it, right?)
I also added some leaves from a lemon balm plant that I recently bought, wondering if it would be a good lemongrass substitute for those of us in temperate climes. (Here in Seattle, lemongrass is grown as an annual, so I'm hoping that lemon balm might be a way to keep this flavor handy year-round.) The verdict: I think so, though the best method for getting the flavor into the dish might require a bit more experimenting. Next time I'll try steeping a sprig in the coconut milk from the beginning and then discarding it before serving, to try to get a subtler flavor more evenly throughout the sauce. (For those inclined to similar experiments in their garden: lemon balm is in the mint family, so for the love of all that is holy grow it in a pot.)
I'm sneaking this in under the wire before the end of Meatless Week on The Cookbook Chronicles. Unfortunately--given that event's purpose of reducing your food's carbon footprint--this supper includes one ingredient that's really pretty bad from a greenhouse-gas point of view. Anyone care to guess what it is?
Spring Vegetables in Coconut Curry Sauce
For a heartier dish, add tofu. To tell you the truth, I kind of wish I had!
1 medium shallot
2 cloves garlic
1 tsp vegetable oil
A sprig (about 9-10 leaves) of lemon balm
1 bunch baby carrots
1 C coconut milk
1 tsp kecap manis
1 tsp curry powder
1/8 tsp salt
About 1 lb baby bok choy
Cooked jasmine rice
Peel the shallot and slice it thinly crosswise. Peel the garlic.
Heat the vegetable oil in a large nonstick skillet over medium heat. Add the shallot and stir for a moment or two. Press the garlic into the pan and stir for a moment more.
Let the shallots and garlic cook for a few minutes while you wash the carrots and trim off the tops. Wash the lemon balm and add it to the pan. Add the carrots to the pan and stir to coat with the oil.
In a small bowl stir together the coconut milk, kecap manis (or a little bit of soy sauce and sugar), curry powder, and salt. Add the sauce to the pan and gently fold it in to the vegetables. Cover the pan, reduce the heat to medium low, and let cook for about 5 to 7 minutes.
Meanwhile, wash the bok choy, trim the ends, and separate the leaves. Then--after the carrots and coconut milk have been cooking for 5-7 minutes--add the bok choy to the pan. Fold the leaves into the sauce, then cover and cook for about 5 minutes more. Remove the lemon balm and serve the curry over rice.
Serves 2.
Tuesday, May 25, 2010
turnips rise to the challenge

This week, local food writer Lorna Yee of The Cookbook Chronicles is challenging her meat-loving self to go vegetarian for a week, and inviting other food bloggers to join her. A fun and worthy endeavor, but at first I thought I couldn't really participate, since we already cook vegetarian every week. Then I started thinking about how dependent my cooking is on milk and (especially) cheese, and how dairy production is almost as bad as meat from a greenhouse-gas point of view. (Shorter food system problem: cows fart, a lot.) So I decided I'd challenge myself to add some vegan recipes to the blog this week.
My first dish, a salad of thinly sliced young turnips, comes from Cackalackyfoodie, a brand-new but already awesome food blog penned by a friend of a friend. The writer, Lynn, gives not so much a recipe as a brief description--a digression on her way to turnip gratin--but it was evocative enough to get me intrigued.
I suppose a vegetable salad doesn't sound like much of a stretch for this assignment. I mean, so I made a salad that was vegan--whoopdeedoo, right? But it's relevant in an unexpected way. Introducing her project, Lorna notes, "I’ve always wondered why we don’t hear people wax poetic about vegetables in the same way they do about meat. Why does the mere mention of bacon cause so many of us to slide off our seats? Are vegetarians in general just simply more restrained in their food-love, or is it something else?"
The answer is: something else. Specifically, I think she just hasn't met the right vegetarian recipes yet. I know I positively swoon for garlicky greens served with poached eggs and toast. And a humble rice and cabbage soup. And unassuming boiled kale. And that's just for starters. Hey, Lorna, you meat eaters can keep your bacon.
So that's where this salad comes in. Okay, so I wouldn't call it quite swoon-worthy, but it's much closer than you might imagine just from looking at the description of barely-adorned unpopular vegetables below. The truth is, even I was expecting a recipe that I wanted to like more than I would actually like it. But it's scrumptious--cold, fresh, and crisp, the slight bite of the vegetables balanced by the fruity richness of the olive oil. A reminder of how delicious it can be to challenge yourself.
Simple Spring Turnip Salad
Adapted from Cackalackyfoodie
This salad is good made an hour or so ahead and chilled, but I like it best the first day it's made.
1 bunch of small Japanese turnips, or a mix of turnips and radishes--about 8 oz. total
1 Tbsp mild, fruity vinegar (I used orange muscat champagne vinegar from Trader Joe's)
Pinch of salt
Freshly ground black pepper to taste
1 Tbsp olive oil
A few sprigs of fresh thyme
Wash and trim the vegetables. Slice them crosswise very thinly using a sharp knife or a mandoline. Arrange them on a serving plate.
In a small bowl, combine the vinegar, salt, and pepper. Whisk in the olive oil. Pour the dressing over the vegetables.
Wash the thyme and pull the leaves off the stems, strewing them over the top of the salad.
Serves 2 or 3.
Tuesday, May 18, 2010
bok choy for a change

Here's the bad news: our camera lens broke. This means that my photos are going to be even more mediocre than usual for the next little while.
But here's the good news: I found something different to do with baby bok choy.
I'd seen the stuff at the farmers market for several weeks running, and it seemed like it might make a good change from the endless bunches of chard and kale we've been eating (that's how you can tell you live in Seattle: your idea of a welcome change from greens is...a different kind of greens). But all I could think of to do with it was to make stir-fry with garlic sauce. Which, don't get me wrong, is delicious, but I wanted something...different.
This recipe fits the bill--roast the cabbage briefly in a very hot oven, then douse it in lemon juice and lemon zest. It's a kind of Marco Polo of a recipe, transporting bok choy from Asia to the Mediterranean.

The original recipe, from Eating Well, is a side dish, but I wanted to make it into a main (translation: I am lazy, and prefer one-dish meals). I glanced at the package of soba noodles sitting in a canister on the counter but initially dismissed them as a possibility--I wanted to keep the dish in the Western Hemisphere. Because I wanted something different. Then I remembered that Italy also has a buckwheat pasta tradition--pizzoccheri, or buckwheat noodles that are typically combined with greens and cheese. Bingo. We have a winner: a quick spring supper that nods to the flavors of a famous peasant dish.
Making this dinner also made me think about the sometimes contradictory and inconsistent rules I have about cooking and eating local food. For example, if a food grows here but isn't in season (tomatoes), I won't buy it. But if a food doesn't grow here at all (lemons), I'll freely use it any time of year. Except that doesn't even quite cover it. I buy bananas nearly every week (though mostly for the sake of my Monkey)--but I'd never buy a pineapple. That totally doesn't make sense, does it? This kind of thing is exactly why I say this blog is about cooking local "in theory and practice"--sometimes there's quite a gap between the two.
How about you--do you have rules, informal or strict, logical or wildly inconsistent, about buying local produce?

Buckwheat Noodles with Lemony Roasted Bok Choy
Adapted from EatingWell
The original recipe calls for tarragon, which I left out because I didn't have it on hand. I think I might add about a teaspoon of fresh thyme next time.
A large bunch of baby bok choy
1 Tbsp olive oil
1 clove garlic
Salt
Freshly grated zest of about 1 lemon
Juice of 1/2 lemon
1 teaspoon mirin, or sherry with a pinch of sugar
Ground black pepper
About 6 oz. dried soba noodles
1 Tbsp olive oil
1 clove garlic
Salt
Red pepper flakes
Parmesan cheese
Put a large saucepan of water on to boil for the pasta. Adjust an oven rack to the lowest position and preheat the oven to 450 F.
While you wait for things to heat up, wash the bok choy, trim the ends, and quarter each head lengthwise. (Really you will probably end up with a lot of loose leaves--that's okay.)
Put 1 Tbsp olive oil in a large baking dish. Peel a garlic clove and press it into the dish. Add about 1/4 tsp salt. Add the bok choy and toss to coat.
Meanwhile, add the soba noodles to the boiling water. They'll need to cook for about 6 to 8 minutes.
Aim to put the bok choy in the oven, on the lowest rack, a minute or two after you begin cooking the noodles. Roast for about 6 to 8 minutes, stirring a couple of times, until the bok choy is wilted but still a little crisp.
Meanwhile, in a small bowl whisk together the lemon zest, lemon juice, mirin or sherry, and black pepper.
Drain the soba noodles and rinse them with cold water.
Take the bok choy out of the oven and pour the dressing over it.
Heat 1 Tbsp olive oil over medium heat in the pan you cooked the noodles in. Add a little salt, some red pepper flakes, and the other clove of garlic, pressed. Stir around for a minute or so. Put the noodles back in the pan and toss around a bit. Add a little water to prevent the noodles from sticking if you need to.
To serve, put some noodles in a bowl, top with some of the bok choy (tongs are your friend in both cases), and grate a bunch of Parmesan cheese over the whole mess.
Serves 2.
Tuesday, May 11, 2010
deja vu all over again

You know what's nice on a spring night in Seattle, when the days are getting longer but the sky's still gray with rain? A good hearty salad...oh wait, did I say that already?
Well, here's the thing. Around these parts when I find an approach to dinner that works I use it over and over again. And again. And then a few more times. I wouldn't call these patterns ruts, exactly--more like kicks. There's only so much creativity I can muster at the end of a long day, you know? So I tend to fall back on variations on a tried-and-true theme.
But for me there's a lot of pleasure in this repetition. I like the reliability of this kind of cooking. And the seasonality of it prevents it from becoming boring--the calendar page will flip and one of these days we'll move on to a new dinner kick (I'm so looking forward to grilled artichokes), so we may as well enjoy this one while we can.
So last week's warm sweet potato salad is followed by this week's warm asparagus salad. This one could hardly be simpler--just roasted asparagus, tossed with fresh herbs and a splash of vinegar while it's still warm, and strewn with a bit of crumbled goat cheese. We're entering that dead-simple-cooking time of year that I love.
We ate this with poached eggs on toast. Of course we did.

Roasted Asparagus Salad
1 pound asparagus
2 large cloves garlic
1 to 2 Tbsp olive oil
salt
black pepper
A large roasted red pepper--or half the contents of a 7-oz. jar
1 to 2 Tbsp red wine vinegar
Chopped fresh herbs--a few tablespoons altogether. I used chervil, parsley, thyme, and chives. Whatever you have in your herb garden will be just fine, I bet.
About 2 to 3 oz. fresh goat cheese (chevre)
Preheat oven to 425 F. Wash the asparagus, break off the tough ends, and cut the stalks into 2- to 3-inch pieces. Peel the garlic. Toss the asparagus in a large baking dish with the olive oil, salt and black pepper to taste, and pressed garlic.
Bake the asparagus--stir once or twice--until the stalks are tender but still firm and bright green, about 15 minutes. If you want delicious little charred bits you can turn on the broiler for the last few minutes of cooking.
While the asparagus is cooking, chop the red pepper into shortish strips and wash and finely chop your herbs.
Remove the asparagus from the oven and let it cool slightly. Then place it in a bowl along with the red pepper strips, splash some red wine vinegar on it, add the herbs, and toss together. Crumble some goat cheese over each serving (best to do this right before eating it so that the cheese doesn't get soggy).
Makes about 3 side-dish servings.
Tuesday, May 4, 2010
the in-between season

You know what's nice on a spring night in Seattle, when the days are getting longer but the sky's still gray with rain? A good hearty salad, even better if it's one that's served warm. Something with bright flavors and fresh vegetables to match the spirit of the season, but cozy and comforting enough to match the actual weather.

This is an adaptation of a salad that made the rounds of the food blogs a few autumns back. To make it a little more spring-like, I added some sumac--a tart, sunny spice--and changed up the vegetables. The winter squash called for in the original recipe are gone from the farmers markets by now, but I found sweet potatoes at the Ballard market a couple weeks back, and that's what I used. But I think you could make this dish with just about any hearty vegetable that will go soft and sweet when roasted--carrots, rutabagas, maybe even cauliflower. Again, it could be almost a recipe template, easily adaptable.

Roasted Vegetable and Chickpea Salad with Tahini Dressing
Adapted from Casa Moro via Orangette
1 1/2 pound sweet potatoes, or a mixture of roastable vegetables
2 Tbsp olive oil
1/2 tsp ground allspice
1/2 tsp sumac
Salt
1 medium clove garlic
1/4 to 1/2 of a medium red onion
Juice of 1 lemon
3 Tbsp well-stirred tahini (that's what the original recipe requests, but I can vouch for the fact that half-assedly stirred tahini will work okay too)
2 Tbsp water
2 Tbsp olive oil
1 medium clove garlic
Salt
1 15-ounce can chickpeas (or 1 1/2 to 2 cups cooked chickpeas, if you're a better person than I am and cook your own beans)
A few handfuls of arugula
Chopped flat-leaf parsley
Preheat the oven to 425 F.
Wash and peel the sweet potatoes (or other vegetables), and cut them into 1-inch cubes (or roughly equal-sized chunks). Place the olive oil, spices, and salt in a large baking dish. Peel the garlic and press it into the dish. Add the sweet potatoes and toss everything together with a spoon or with your hands. Put in the oven and bake for 15 to 25 minutes, until the sweet potatoes are soft. Remove from the oven and cool a bit.
While the vegetables are cooking, chop the onion very fine and place it in the bottom of a serving bowl. Squeeze the lemon juice over it and stir with a fork. (This step is optional, but good to do if you don't like your onion very strong.)
In a small bowl, stir together the tahini, water, and olive oil. Add salt to taste. Peel the garlic and press it into the bowl. Stir everything together to combine.
Drain and rinse the chickpeas. Wash the arugula and spin dry.
When the vegetables are out of the oven and cooled to somewhere between piping hot and room temperature, assemble the salad. Add the chickpeas and vegetables to the bowl with the onion and lemon juice, and toss gently to combine. Add tahini dressing to taste and toss again--or, let each person drizzle the dressing over their individual serving. If you're really together, sprinkle each plate with a little chopped parsley.
Makes 4 to 6 servings.
Tuesday, April 20, 2010
revising my remarks

Okay, I lied before. This is as close to meat and potatoes as we get in our household: fake meat, and actual potatoes.
The recipe is Potatoes Colcannon, and it comes from June Platt's New England Cookbook, which I got for 50 cents at a tag sale on a weekend trip to Arizona last month.
Yes, fifty cents. Can you believe it? It has an introduction by James Beard, the copy is in perfect condition, and how awesome is that cover image?

The book was published in 1971--I'm really interested in vintage cookbooks these days. I just think that in many of these books, mixed in amid the charmingly old-fashioned writing style and the hilariously outdated recipes, are likely to be some forgotten but delicious ways to prepare seasonal vegetables.
Ms. Platt's recipe for Potatoes Colcannon delivers. I suppose it's not really the traditional approach to colcannon (I'd never heard of making it with spinach rather than cabbage), but it's fantastic. And I think you could make it with just about any of those spinach- or chard-like greens that are so abundant in Seattle
There are actually two approaches to serving this dish. If you're in a hurry, you can just stir the potatoes and greens together and serve immediately--the dish is soft and silky. Or, if you want to be a stickler for Ms. Platt's method, you can turn the stuff into a baking dish, put it in the oven for a while, and then unmold onto a plate.

I think both options are great.
Potatoes Colcannon
Adapted from June Platt's New England Cookbook
Russet potatoes--a little less than 1 pound
Greens--a big bunch of chard, about 1/2 lb spinach leaves or braising mix, or a 10-oz package of frozen spinach
2 Tbsp butter
2 large cloves garlic
1/4 C cream
Salt and pepper to taste
Wash and peel the potatoes, and cut into medium-size pieces. Place them in a large saucepan, cover with cold water, and add 1/4 tsp salt. Cook until they are tender through, or for about 25 minutes. Lift the potatoes out of the water with a slotted spoon and cool in a colander.
If you are using frozen spinach, defrost it and squeeze out the water. If using fresh greens, wash them to remove any dirt, and then cook them in the potato water for a few minutes, until they are bright green and just tender. Drain in a sieve, press the water out of the greens with a spoon, and then when they are cool enough to handle chop them finely.
If you're going to bake the colcannon, start preheating the oven to 400 F now.
Melt the butter in the saucepan, peel the garlic, and press the cloves into the pan. Saute over medium heat for a few minutes, until fragrant. Turn the heat down as low as it will go, return the potatoes to the pan, add the cream, and mash until the potatoes are light and fluffy. Add the chopped greens and continue to mash until the potatoes and greens are well mixed. Add salt and pepper to taste (I like a generous hand with the pepper, though little ones may disagree).
Serve immediately, or pack the mixture into a well-buttered deep 3-cup mold or small baking dish. Place in the hot oven and allow to heat thoroughly, about 10 to 15 minutes. Run a knife around the edge of the dish, and turn out, like a mud pie*, onto a hot serving dish.
Serves 2 to 3 as a main dish with sausages or poached eggs.
*That sentence is directly from June Platt's original. "Like a mud pie"--I love imagining her trying to think of a description that would be as broadly accessible as possible, and finally hitting upon this. Everyone knows about unmolding mud pies--oh yes.
Tuesday, April 13, 2010
round and round we go
The funny thing about seasonal cooking is that it leads to seasonal thinking. About this time two years ago I was making excuses for posting a chili recipe, noting that it would still be chili weather in Seattle for some weeks yet. And now, the same thoughts having apparently gone round and round in my head along with the months, here I am in high spring, offering you a hearty soup.
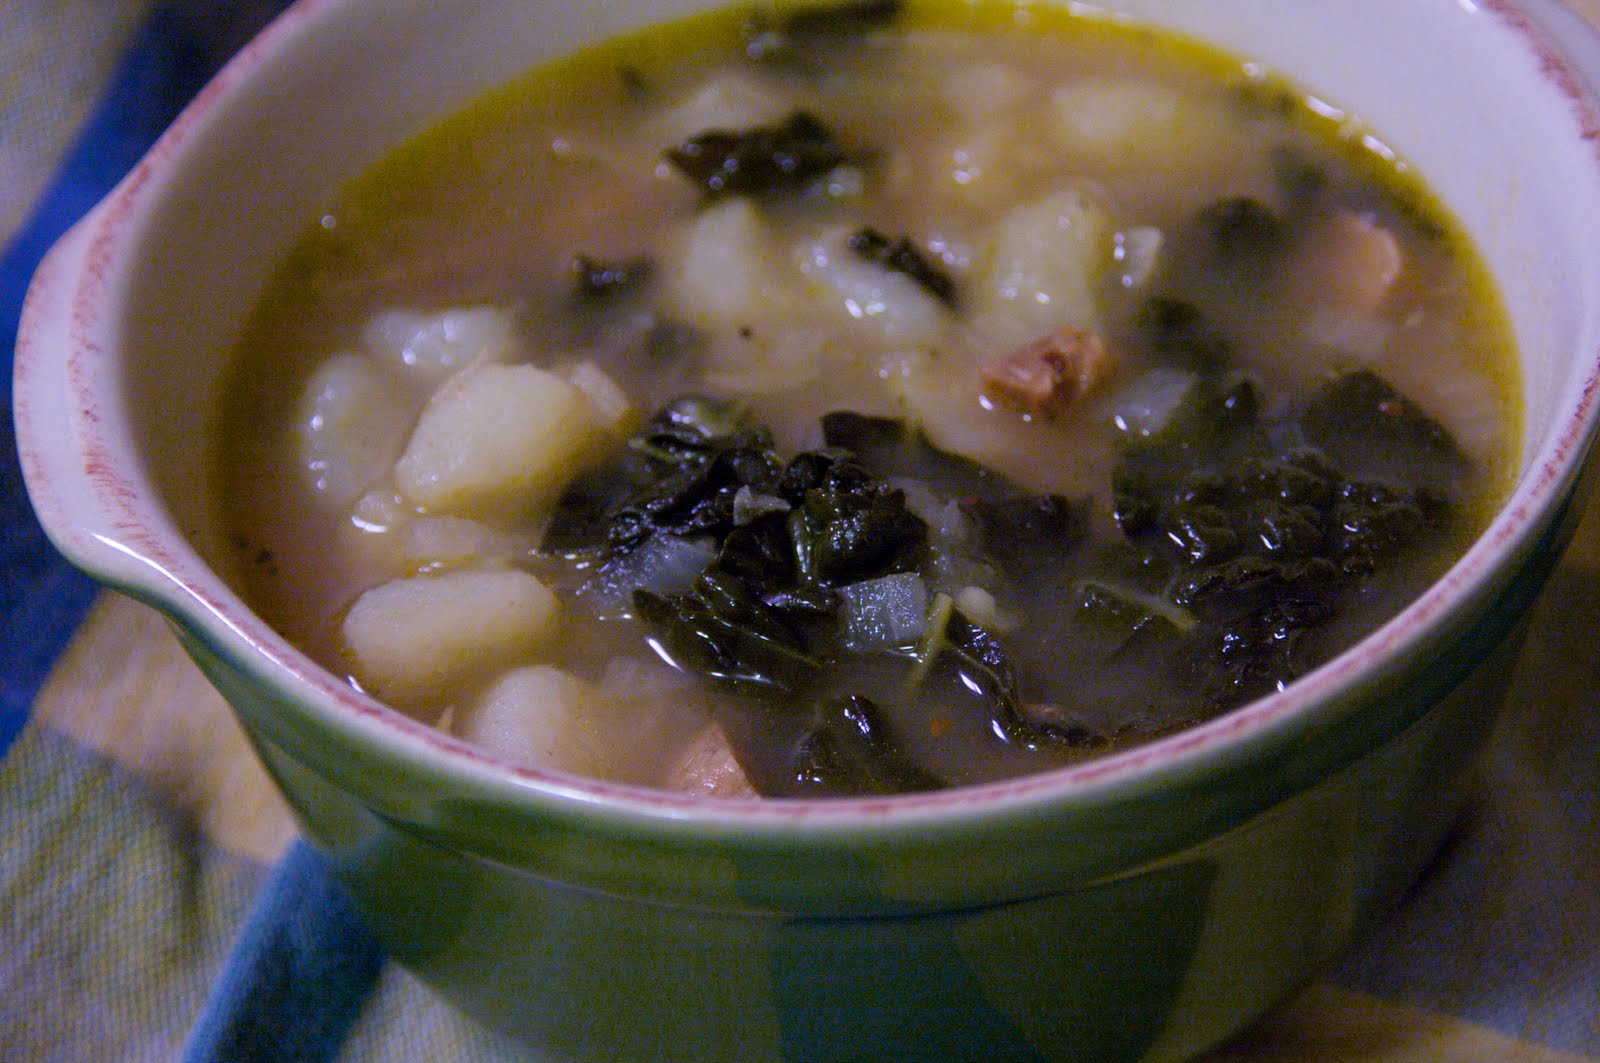
But what a soup! This version of caldo verde, or Portuguese kale soup, comes from Emeril (yes, that Emeril...I know! But stick with me) via The Splendid Table. It's simple, savory, and makes a ton. And it's a great use for the greens that are so plentiful at Seattle farmers markets this time of year. (See? Seasonal. Q.E.D.)
The notes to the original recipe say that the kale should be cooked just a bit and stay crisp-tender, but since I made this a day ahead of eating it the kale ended up pretty thoroughly soft, and I have to admit I really liked it that way. But the best thing about the soup? Is the way the potatoes cook until they start to fall apart--they get almost silky and the starch that they release thickens the soup a bit. Fantastic.
Caldo Verde
Adapted from The Splendid Table
2 medium yellow onions
3 small/medium cloves garlic
2 Tbsp olive oil + a little more, divided
2 lb. potatoes
7 C stock or water
Salt and pepper to taste
2 Tofurkey Italian sausages or similar (or 1/2 lb. chorizo or hot smoked sausage)
1/2 lb. kale (I used lacinato kale because I can't get enough of the stuff; curly kale is probably more authentic)
Crushed red pepper (or add 1/2 tsp to the pot)
Peel the onions and chop them finely. Peel the garlic. Heat 2 Tbsp. of the olive oil in a large soup pot, add the onions, and press the garlic into the pot. Cook, stirring occasionally, until they are soft and translucent. Meanwhile, peel the potatoes and cut them into 1/2-inch cubes. Add the potatoes and stock or water to the pan. Then add salt and pepper, and the crushed red pepper if you don't have sensitive palates in the house. Cover the pot, bring to a boil, then reduce the heat and simmer until the potatoes are tender, about 20 minutes.
While the soup is cooking, wash the kale, cut away the tough center ribs, and cut the leaves into thin strips. When the potatoes are tender, add the kale and simmer until the leaves are softened, about 15 minutes longer. (I put the kale in the soup, turned the heat off, cooled the soup and refrigerated it overnight, then reheated the next day. If you're making the soup the day you plan to eat it and you want the kale really soft, you may need to simmer a little longer. If you're making it a day ahead and want the leaves to stay a little crisp, don't add them until you start reheating the soup the day you're going to eat it.)
Meanwhile, cut the soysages into small dice (or crumble or dice the sausages), and saute in a small skillet in a little bit of olive oil until they are crispy. Then slide them into the soup.
To serve, ladle into bowls and sprinkle each serving with crushed red pepper to taste.
Makes at least 6 servings.
Wednesday, March 31, 2010
ribs
Or stems, if you prefer.
No, not pork ribs, or human stems--nothing quite so decadent. But stay with me. It's just that--now that you are addicted to Swiss chard I bet you are wondering what to do with all those chard middles languishing in your crisper drawer. Am I right?
I am here to help you out.
Well, I'm doing my best anyway. I'm going to tell you up front. My husband's comment on this dish was "I'm glad we're using up the chard stems." As you know, what I'm really aiming for here is more like "Hot damn! Chard stems for dinner!"
And this wasn't quite that. But it has potential, and I think my main mistake was being in too much of a hurry. I recommend that you cook the chard stems until they're downright silky. I took them off the heat when they were still rather crisp and celery-ish.
Give it a try--just be patient.

Swiss Chard Ribs with Goat Cheese and Pasta
Adapted/elaborated from Simply Recipes
Ribs from 2 bunches of Swiss chard
2 Tbsp butter
2 large cloves garlic
1/2 C half-and-half
about 8 oz. dry pasta
3 oz.or so fresh chevre
Salt and pepper
Put a large saucepan or soup pot of salted water on to boil. Wash the chard ribs, trim them, and chop into large-ish pieces. When the water boils, blanch the chard ribs for 3 to 5 minutes. Lift them out with tongs and drain them in a colander. (I know that sounds really specific, but the point is you can save the water to boil your pasta in.)
When the chard ribs are cool enough to handle, chop them into 1/2- to 1-inch pieces. Heat the butter in a large skillet on medium heat. Peel the garlic and press it into the skillet. Saute for a minute or two, then add the chard ribs and saute for a few minutes more. Now add the cream, cover the skillet, turn down the heat, and really just braise the heck out of those chard ribs. Add a little more cream, stock, or water if the skillet gets too dry.
Meanwhile turn on the flame under your pan of water again, and when it returns to a boil add the pasta. Drain when it's al dente.
When the chard ribs are nice and silky, add the drained pasta to the skillet, along with the chevre (crumble it up into little pieces). Toss to heat through and combine, and season with salt and pepper.
Makes 3 to 4 servings.
Wednesday, March 17, 2010
green day

I'm at most 3 or 4 percent Irish. I was going to say 0 percent, but then I remembered that my grandmother once described her mother as "a duke's mix"--by which I gathered she meant some amalgam of English/Scotch/Irish, though it turns out that the phrase "a duke's mixture" has a more general, and quite fascinating, definition.
(Also, now I want this Duke Ellington CD. Just on principle.)
Anyway I'm certainly 0 percent Irish Catholic. (My great-grandmother must have been vehemently Protestant, else my Dutch Calvinist great-grandfather would never have married her. I'm just reporting, not endorsing, you understand.) I'm sure you know where I'm going with this: St. Patrick's Day has never been a big deal in my household. Still, eating more greens is something I can get behind any day of the year.
Originally, the recipe below was the sauce for a baked chicken dish called Chicken Ala Maria (doesn't that just sound hopelessly '80s?) that we ate fairly frequently when I was growing up. Somewhere along the line, as my family became more veg-centric, the chicken dropped out and the dish turned into a kind of spinach gratin. My mom used to make it with frozen spinach, but I thought I'd see if it would work with chard.
Yes, it would.
In fact, with all apologies to my mom, I think it's better than the original. This version is creamy and comforting but still has a bright-green taste; it's satisfyingly retro without tipping over the top into kitsch.

In light of the discussion above, it also pleases me to realize that I've just taken what started out as a horribly inauthentic American attempt at Italian (?) food, further mongrelized it, and presented it to you for St. Patrick's Day. A duke's mix!
Anyway, whatever you call it, it's very tasty. We ate it with veggie sausages (slice up a small onion and a couple of mushrooms, saute them in olive oil in a large nonstick skillet until caramelized, then deglaze the pan with a bit of balsamic vinegar, and cook two sausages, sliced lengthwise, in the pan), and pasta tossed with oil, garlic, and chili flakes. As close as we get to meat and potatoes around here.

Chard Gratin
3/4 C Italian seasoned breadcrumbs (actually, I think you could decrease this to 1/2 C)
1/4 C grated Parmesan cheese
1 medium yellow onion
2 T butter (or oil)
2 T flour
1 C milk (or broth)
2 good-sized bunches chard, about 12 oz. total
In a small bowl, combine bread crumbs and cheese.
Wash the chard, remove the thick center ribs, and chop roughly. Chop the onion.
In a large skillet melt the butter, then saute the onion until tender. Blend in flour and stir in milk all at once. Cook and stir until thick and bubbly. Stir in the chopped chard and cook, stirring, until wilted.
Spoon into a greased casserole dish and bake, uncovered, at 350 F for 40-45 minutes.
Serves 4 as a side dish.
Friday, March 5, 2010
dear sweet lacinato rabe, where have you been my whole life?
When I made this dish two weeks ago I figured I wouldn't post it, because it's nothing very original, nor even anything you haven't seen before on this blog.
Then I spent the whole week thinking about the meal I'd had, and decided: who cares about groundbreaking, the entire world MUST be told about this!
So I made it again. Not without trepidation (I was afraid it wouldn't be as good as I remembered--you know, the same feeling that makes you hesitate to re-read your favorite novel or re-watch your favorite movie). But this stuff--this "lacinato rabe," which I'd bought on a whim at the farmers market two weeks ago--delivered.
Weird name, right? What is lacinato rabe? Well, it has stems and little flowers like broccoli rabe (or broccoli raab or rapini or whatever you want to call it)
 And leaves like lacinato kale (or tuscan kale or dinosaur kale or, again, whatever you call it)

I found it at Nash's Organic Produce, which has a booth at the University District market on Saturdays, and Ballard on Sundays. Go forth, Seattleites, and enjoy!
In the past I've had bad luck with rapini--I'd cook it and cook it but the stems always seemed to stay stringy and inedible. This particular variety seems to have gloriously juicy, tender stems. But I think the secret to broccoli rabe in general is this: don't wait too long to harvest it, and don't wait too long to cook it.
What you do is this: blanch the lacinato rabe, then saute it with olive oil, garlic, and chile flakes. Dump the whole mess over garlic-rubbed toast and a couple of poached eggs (I know, I know--I never promised you originality) and grate a bunch of Parmesan cheese over the top. After dinner, think about how you could eat nothing else for the rest of your life.

The Dinner You'll Keep Thinking About
It can be tough to time everything just right with this recipe. To keep everything from happening all at once, you could blanch the greens and toast the bread a bit ahead of time.
1 bunch lacinato rabe (or other variety broccoli rabe/rapini)
olive oil
garlic
crushed red pepper
salt
4 thick slices crusty bread
4 eggs
2 Tbsp white vinegar
Parmesan cheese
Put a large pot of salted water on to boil. Wash the greens. Peel about 4 good-sized cloves of garlic.
Fill a large skillet with water, and add 2 Tbsp white vinegar and some salt. Crack each of the eggs into its own small bowl.
When the big pot of water boils, throw the greens in and blanch them for a couple minutes, until the leaves and stems are bright green. Drain.
Turn on the skillet to boil the water for the eggs. Toast the bread and rub it with one of the garlic cloves. When the greens are cool enough to handle, chop them roughly.
In another skillet, heat the olive oil over medium heat. Press the remaining garlic cloves into the pan. Add some salt and crushed red pepper. Stir around for a minute or two. Throw in the blanched greens and saute for a few minutes.
Meanwhile, poach the eggs. To assemble the dish, put a couple pieces of toast on a plate, put a poached egg on top of each one, throw the sauteed greens on top, and grate some Parmesan cheese over the whole works.
Serves 2
Then I spent the whole week thinking about the meal I'd had, and decided: who cares about groundbreaking, the entire world MUST be told about this!
So I made it again. Not without trepidation (I was afraid it wouldn't be as good as I remembered--you know, the same feeling that makes you hesitate to re-read your favorite novel or re-watch your favorite movie). But this stuff--this "lacinato rabe," which I'd bought on a whim at the farmers market two weeks ago--delivered.
Weird name, right? What is lacinato rabe? Well, it has stems and little flowers like broccoli rabe (or broccoli raab or rapini or whatever you want to call it)


I found it at Nash's Organic Produce, which has a booth at the University District market on Saturdays, and Ballard on Sundays. Go forth, Seattleites, and enjoy!
In the past I've had bad luck with rapini--I'd cook it and cook it but the stems always seemed to stay stringy and inedible. This particular variety seems to have gloriously juicy, tender stems. But I think the secret to broccoli rabe in general is this: don't wait too long to harvest it, and don't wait too long to cook it.
What you do is this: blanch the lacinato rabe, then saute it with olive oil, garlic, and chile flakes. Dump the whole mess over garlic-rubbed toast and a couple of poached eggs (I know, I know--I never promised you originality) and grate a bunch of Parmesan cheese over the top. After dinner, think about how you could eat nothing else for the rest of your life.

The Dinner You'll Keep Thinking About
It can be tough to time everything just right with this recipe. To keep everything from happening all at once, you could blanch the greens and toast the bread a bit ahead of time.
1 bunch lacinato rabe (or other variety broccoli rabe/rapini)
olive oil
garlic
crushed red pepper
salt
4 thick slices crusty bread
4 eggs
2 Tbsp white vinegar
Parmesan cheese
Put a large pot of salted water on to boil. Wash the greens. Peel about 4 good-sized cloves of garlic.
Fill a large skillet with water, and add 2 Tbsp white vinegar and some salt. Crack each of the eggs into its own small bowl.
When the big pot of water boils, throw the greens in and blanch them for a couple minutes, until the leaves and stems are bright green. Drain.
Turn on the skillet to boil the water for the eggs. Toast the bread and rub it with one of the garlic cloves. When the greens are cool enough to handle, chop them roughly.
In another skillet, heat the olive oil over medium heat. Press the remaining garlic cloves into the pan. Add some salt and crushed red pepper. Stir around for a minute or two. Throw in the blanched greens and saute for a few minutes.
Meanwhile, poach the eggs. To assemble the dish, put a couple pieces of toast on a plate, put a poached egg on top of each one, throw the sauteed greens on top, and grate some Parmesan cheese over the whole works.
Serves 2
Monday, March 1, 2010
linguine with brussels sprouts barigoule: a conversion story

The second thing you need to know about the dish is that the recipe, from the March 2009 issue of Gourmet (yup, it's that time again--this is my Gourmet, Unbound submission for this month), will make you say, "What the--?" Probably several times. After struggling through cooking it, I wished I'd read up more on the Barigoule preparation beforehand, so that I would have understood better what I was aiming for.
Except that there's not much available online about what Barigoule means. As best I can sleuth out, it's a Provencal preparation, usually applied to artichokes, and its defining characteristic is the presence of a kind of orange mushroom--the mushroom is called "barigoule" in the Provencal dialect, and hence the name of the dish.
Except, of course, there aren't any mushrooms in the Brussels sprouts recipe. So that background is no help at all.
Here, then, is what I wish I'd known before I started cooking: When you glance at the ingredients and technique, you might think, "Oh, okay, pasta tossed with braised vegetables. Sounds familiar." But as you actually read through the recipe it's likely to sound less and less familiar. And when you get to the part where you are supposed to add four cups of water to the cabbage you might even say, "Oh ho, Gourmet magazine, do you think I don't remember how you told me to add way too much water to those braised turnips recently? I'm not going to be fooled by you again!" You might even decide that since cabbage contains a lot of water you can just braise it in its own juices and so you're not going to add any water at all.
And then you might scorch the cabbage.
But do not fear! Even if you do scorch the cabbage the final dish will still be delicious. Don't ask me how I know.
The thing is, you aren't making braised vegetables tossed with pasta. What you are really making is a kind of a soup. Sauteed leeks, garlic, and Savoy cabbage--like a variation on a mirepoix--form the base of a white wine and lemon broth. The Brussels sprouts are added just at the end of cooking, so that they stay bright-green and a little bit crisp. Meanwhile you'll cook pasta until it is not quite done, then combine it and some of its cooking water with the vegetables--there you'll simmer the pasta the rest of the way to al dente. The technique lets the broth flavor the pasta, and the pasta thicken the broth slightly. It's quite brilliant, once you grasp what the recipe is driving at.

The dish is finished with a generous grating of Parmesan cheese, and please don't skip this part. That little bit of richness just makes the dish. (And about now you're probably realizing that this recipe has much in common, flavor-wise, with Rice and Smothered Cabbage Soup--and we all know how fantastic that stuff is, right?)
My husband did have one quibble with the recipe--he wanted a greater proportion of vegetables to pasta. That's right: he wanted more Brussels sprouts. I can't quite believe it myself. But I think he's right. Especially because if you have leftovers the pasta will sit and soak up all the broth while you're eating, and then you're left with no broth for the next day. The Brussels sprouts and broth, sans pasta, would also be good ladled over a thick piece of crusty bread that has been rubbed with garlic, piled high with grated Parmesan, and run under the broiler. You could even add a poached egg on top. What? How did you know I was going to say that?
Anyway, one way or another, I recommend giving it a try.
Linguine with Brussels Sprouts Barigoule
Adapted from Gourmet magazine
2 leeks
A small head of Savoy cabbage (about 1/2-3/4 lb.)
2 Tbsp extra-virgin olive oil
3 Tbsp butter
1/2 tsp salt, divided
1/2 tsp pepper, divided
4 cloves garlic
2/3 Cup dry white wine
4 Cups water
Juice of 1/2 lemon
1 tsp fresh thyme leaves, divide
1/2 lb Brussels sprouts
3/4 lb dried linguine (I used spaghetti, which was fine, but it really would be better with a wider noodle. And, as mentioned, I'd cut this down to maybe 1/2 lb next time.)
1/4 C chopped parsley
Plenty of Parmesan cheese
Wash the leeks and thinly slice the white and pale green parts. Quarter the cabbage, core it, and slice it thinly.
Heat the olive oil and 2 Tbsp of the butter in a heavy, 12-inch skillet over medium heat. Add the leeks, cabbage, and 1/4 tsp each salt and pepper. Cook, stirring occasionally, until softened, about 5 minutes. Meanwhile, peel the garlic. Then press the garlic into the pan and cook, stirring, for another minute or so. Add the wine and simmer until most of the liquid has evaporated, about 2 to 3 minutes. Add the water, lemon juice, 1/2 tsp thyme, and the remaining 1 Tbsp butter. Cover and simmer briskly until the cabbage is very tender and the liquid has reduced by half, about 15 minutes.
When the cabbage begins to simmer, put a large pot of salted water on to boil for the pasta.
While the cabbage cooks, wash the Brussels sprouts, trim the stems, and pull off any discolored leaves. Quarter the Brussels sprouts lengthwise.
When the cabbage is just about done, add the pasta to the boiling water. Then add the Brussels sprouts to the broth with the cabbage and simmer, covered, stirring occasionally, for about 5 minutes, until the sprouts are bright-green and slightly tender.
When the pasta is not quite al dente, remove and reserve 2 cups of the pasta cooking water and drain the pasta. Transfer the vegetables to the pasta pot, and then return the pasta and cooking water to it, along with the remaining 1/4 tsp each of salt and pepper. Simmer for a couple of minutes until the pasta is done.
Off the heat, stir in the parsley and remaining 1/2 tsp thyme. Serve in shallow bowls with some of the broth. Grate a generous amount of Parmesan cheese over each serving.
4 to 6 servings.
Saturday, February 27, 2010
maven

Spring will be here soon.

I should be excited. Asparagus, rhubarb, strawberries, peas!

And the promise of summer and tomatoes to come.

Best of all, a break from root vegetables. Everyone keeps talking about how they're sick to death of root vegetables right now.

Granted, I might feel differently about bidding goodbye to winter if I lived in the frozen, snow-blanketed East.

But the truth is, I'm not that eager for spring. I'm kind of enjoying hanging out with all these root vegetables, and I'm not really looking forward to leaving them behind. Not now when I feel like I'm just getting to know them.

I guess I've developed a strange new ambition--I'd like to become a maven of unpopular vegetables.

See how pretty they can be?
Here's a simple preparation for those rutabagas above. The recipe is from a January New York Times article by Melissa Clark. She describes cooking rutabagas for the first time, roasting them, and writes that they were "so good, in fact, that I couldn’t stop eating the cubes straight from the pan."
I read that and I thought: Sign me up!
Clark combines her rutabagas with farro and ricotta salata cheese for a hearty winter salad. Which sounds fantastic and is on my list to try--but I just roasted them up and put them over some pan-fried cakes made from leftover pilaf (I'll have that recipe for you soon as well).
Or you could just eat the rutabaga straight from the pan. Roasted, it's sweet and soft, with just enough bite underneath to remind you you're not eating dessert.

Roasted Rutabagas
Recipe from Melissa Clark
1 1/2 lb rutabagas
2 tsp olive oil
1 Tbsp maple syrup
1/2 tsp salt
freshly ground black pepper
Turn on the oven to 400 F. While the oven heats, peel the rutabagas and cut them into 3/4-inch cubes. In a large baking dish, toss the rutabaga pieces with the remaining ingredients. Put them in the oven and roast, stirring once or twice, until they are caramelized in spots and very soft, about 30 to 40 minutes.
Serves 4 as a side dish.
Wednesday, February 24, 2010
egg-free apple muffins and a love letter to my mother

Way back when, I promised you that I'd post about what I cook for and with Monkey, and I figured it was time to finally deliver just a little bit. The bonus is that these apple muffins (which are also great with pear or Asian pear) also more or less fit the seasonal produce theme.
We took a batch of these muffins to a playdate last Friday. In fact, I'd asked Monkey on Thursday night what she wanted to do on Friday and she said, "Go to T.'s house and eat muffins." Awww, so sweet, right? She really likes her friend T.!
Except that I'm pretty sure the truth is that T. is great and all but what she really likes are the muffins.

I don't know where the recipe originally came from; my mom used to make them a lot when I was a kid and they were a fixture of college care packages (and post-college care packages. Okay, my mom still sends me care packages--and that's just how I like it).
We made this batch without eggs, because Monkey has an egg allergy that was diagnosed when she was a little over a year old.
Yeah. So my best advice if you want to know how to prevent food allergies is don't rant on the Internet about how overblown they are.
Anyway, adapting baked goods to be egg-free has actually been relatively easy, thanks to this substitution trick that, again, comes from my mom. You see, my little sister was vegan for a while (then she was freegan, and now she's just a vegetarian like a normal person), and my mom wasn't going to let a little thing like veganism stand in the way of sending care packages.
The trick is this: for each egg, substitute 1 Tablespoon cornstarch mixed with 1 Tablespoon water. That's it.

No really, that's it. That's pretty much the only egg substitution trick I know. I mean sure, I've heard about flax and tapioca flour, but I've never tried them. Recently another mom with an egg-allergic kid asked me what I thought about that Ener-G egg replacer and I said, "Ummmmm." I live under a rock. But next time I went to the store I checked it out and was very gratified to see that the stuff is mostly cornstarch, plus a few additives, for $6 a box. I'm sticking with cornstarch from the bulk bins.
That said, I'm not going to lie to you: recipes often don't turn out exactly the same with cornstarch as they do with eggs. But this apple muffin recipe works particularly well with the cornstarch substitution, so it's become a go-to recipe for us. I mean, look at these beauties! You wouldn't guess they were egg-free, would you?

Egg-Free Apple Muffins
1 3/4 C flour
1 Tbsp cinnamon
1 tsp cardamom
1 tsp baking soda
4 Tbsp softened butter
1/2 C granulated sugar
1/4 C brown sugar
1 Tbsp cornstarch dissolved in 1 Tbsp water (or, of course, 1 egg)
1 C buttermilk (I usually use milk soured with a little lemon juice and left a few minutes to thicken*)
1 large apple, cut into 1/2 inch chunks
Preheat oven to 400 F. (While the oven is preheating you can soften the butter by putting it in a large bowl and sticking it in the oven for a minute or two.) Spray muffin tin or fill cups with paper liners.
In a large bowl, mix together the flour, spices, and baking soda.
In a separate bowl, cream together the butter and sugars. Stir in the cornstarch-water mixture. Quickly fold in the buttermilk or soured milk. Do not overmix or the batter will curdle.
Gradually add the dry ingredients to the wet ingredients, making sure there are no lumps, but mixing no more than necessary. Fold in the apple chunks. Divide batter into muffin tins and bake 15 minutes.
Makes 1 dozen.
*I learned just yesterday as I was writing up this post--crazy coincidence, right?--that this is called "clabbered" milk. Or more precisely, it's a quick version of clabbered milk, which traditionally is made by letting milk sour and then putting it in a warm spot to let good bacteria grow, which in turn prevents bad bacteria from growing. Hey, come to think of it, that process sounds exactly like making creme fraiche. Hmm, how did human beings come up with all this stuff? Anyway, "clabbered." Good word.
Subscribe to:
Posts (Atom)